A few months ago I moved into a new home which meant having to re-setup all my home automation. One of the things which was going to be problematic was finding a way to control my new home’s existing air-conditioners. I also bit the bullet and opt to go the easy path of buying a couple Sensibo devices but the price was a major turn-off. At my previous home I had setup an ESP2088 as an RF controller to control my fans, doing the same for IR shouldn’t be much more difficult.
I didn’t have any more spare ESP devices and would have to buy some along with an IR transmitter and receiver, the latter for being able to capture signals from the remote controllers. There were a few parts and was worried that it would be very fiddly. I deviced to change tact and buy a device with all necessary components assembled, ie. an IR controller. There are a heap available on the Internet and, more convenient for me, available at my local Bunnings.

This was fairly cheap at $30 AUD, which might be around the same cost as buying all the components individually but comes in a neat enclosure. Flashing this device with a custom firmware is trivial but it does require opening the device up for two reasons, the first is due to rumors that the chipset may have changed and need to confirm it can still be flashed. The second is to short the device during boot in order to be able to flash the chip.
Replacing the firmware
In order to continue there are a few things that are needed to proceed. The first, and most important, is a computer that will run ESPHome to flash the device. The second most important thing you’ll need is an FTDI in order for your computer to communicate with the IR Controller.
Opening it up isn’t too tricky just pop the rubber plugs out and, with a small flat-head screwdriver, unscrew the triangle screws.
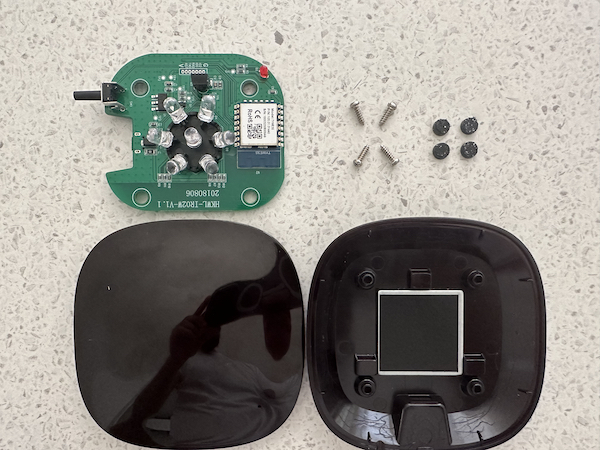
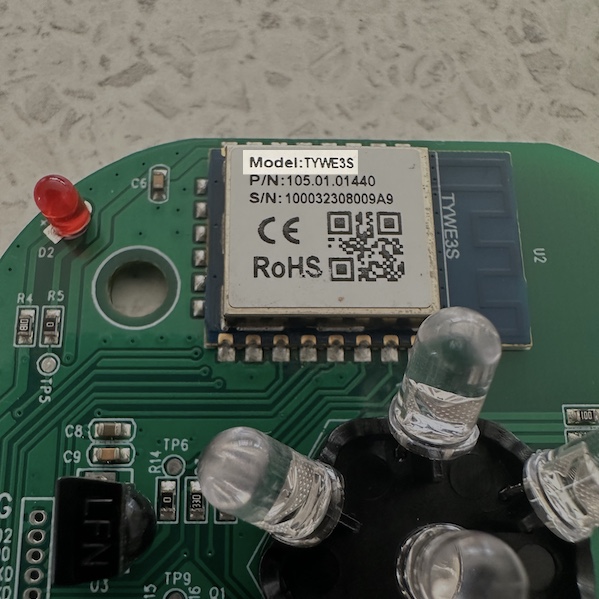
Next you’ll need to check the micro-processor to ensure that it can be flashed. If TYWE3S is shown then you’re in luck. If it’s not then that doesn’t mean it’s not possible to continue but that you’ll have to figure it out.
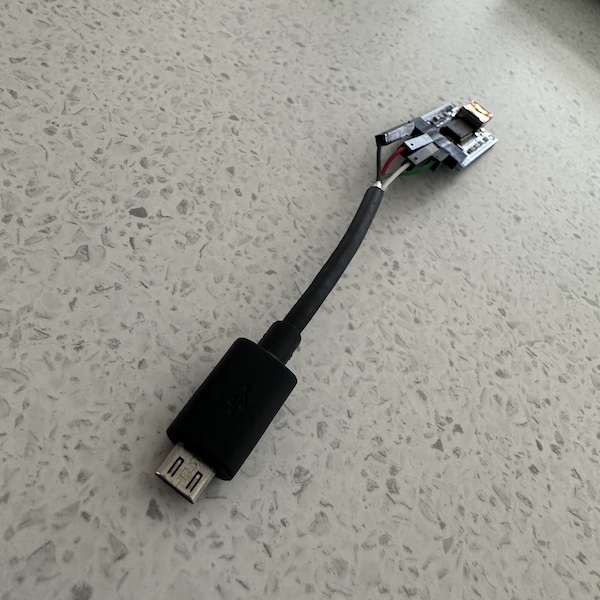
The easiest way to connect the IR Controller to the FTDI is using an expendable micro-USB cable. Plug the cable to the IR Controller and cut the other end of the cable. There should be 4 coloured wires. Red, black, green, and white. Connect the red wire to the 5V or VCC pin on the FTDI. Connect the black wire to the ground pin. Connect the white wire to the RX pin and the green wire to the TX pin.
Once the IR Controller is connected to the FTDI and that is connected to your computer you’ll want to prepare a config for ESPHome to build a new firmware. Do not turn on the FTDI yet. If you can’t toggle power to your FTDI just leave it unplugged.
You can use the following config to get started. Don’t forget to change ac_platform to match your AC.
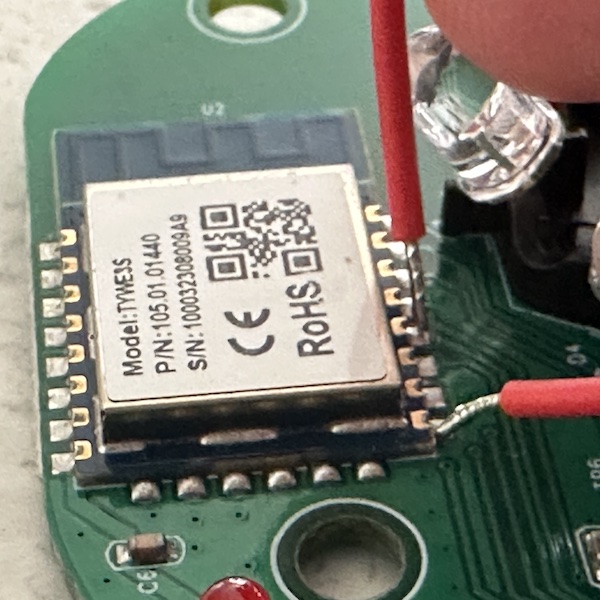
It is now time to compile and flash the device. This is probably the trickiest part but (hopefully) you’ll only have to do it once. Before powering up the IR Controller through the FTDI make sure to short GPIO0. To accomplish that simply use a small wire, or anything, to connect GND (ground pin) to GPIO0 as pictured.
Power up the FTDI, or plug it in, and after approx 5 seconds you can remove the wire. If all is successful the LED on the device should not turn on. If it does turn on that means it didn’t work and you’ll have to try again.
You are now ready to run ESPHome with your config. Depending on how you’ve chosen to run ESPHome the command may vary.
Manually installed
esphome run PATH_TO_CONFIG
Docker
docker run --rm --privileged -v "${PWD}":/config --device=/dev/ttyUSB0 -it esphome/esphome run PATH_TO_CONFIG
Note you may need to change /dev/ttyUSB0 to point to your FTDI if it is different.
ESPHome Dashboard / Home Assistant
Install the add-on in Home Assistant or run the following from the command line:
docker run --rm --net=host -v "${PWD}":/config -it esphome/esphome
Create a new project and copy the contents of the config from earlier and save. Then click “Install” and select “Plug into the computer running ESPHome Dashboard” followed by selecting the FTDI device.
If all has gone well a new firmware would have been compiled and flashed onto the device. You can then put it all back together and try controlling your AC with it.
There may be some tinkering required in case your AC is not properly supported, but that is beyond the scope of this guide. Regardless, you can simply use ESPHome to update the device whenever you make changes without the need to plug in or open up the device.
References
I could not have accomplished any of this without help from the following resources.