Please read Part 1 of my guide if you haven’t yet done so.
Beyond Home Assistant
With Home Assistant, formally known as Hassio, all up and running the next step is to run Docker containers using the Supervisor. I should mention that running Docker containers through Home Assistant’s Supervisor is different than typical runtimes but it’s not difficult if you’re familiar building Docker containers. How this is accomplished is by using Add-ons.
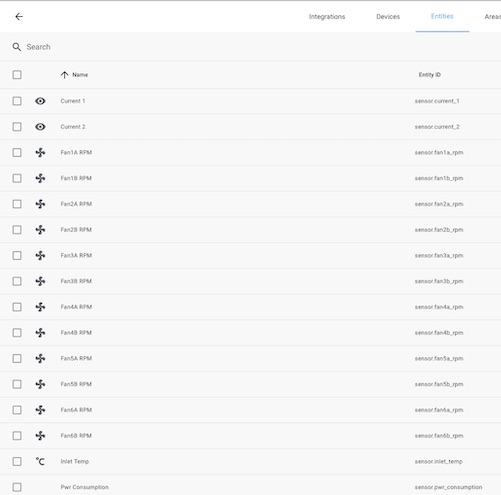
Since Home Assistant is running on a PowerEdge R420 I wanted it to capture as many stats about the system as possible. The System Monitor exposes some basic information about the host, but the PowerEdge offers much more such as fan speed, various power usage and info, and temperature. The problem is that there’s no built in integration in Home Assistant to access this information. I will have to do this myself.
Getting the information
First thing to do is access the information. A big of searching yielded me to discover ipmitool. After installation I ran a command to get all sensor information:
$ sudo ipmitool sensor
SEL              | na         | discrete   | na    | na        | na        | na
| na        | na        | na
Intrusion        | 0x0        | discrete   | 0x0080| na        | na        | na
| na        | na        | na
Fan1A RPM        | 1680.000   | RPM        | ok    | na        | 720.000   |
840.000   | na        | na        | na
Fan1B RPM        | 1560.000   | RPM        | ok    | na        | 720.000   |
840.000   | na        | na        | na
Fan2A RPM        | 2160.000   | RPM        | ok    | na        | 720.000   |
840.000   | na        | na        | na
Fan2B RPM        | 2280.000   | RPM        | ok    | na        | 720.000   |
840.000   | na        | na        | na
Fan3A RPM        | 2280.000   | RPM        | ok    | na        | 720.000   |
840.000   | na        | na        | na
Fan3B RPM        | 2280.000   | RPM        | ok    | na        | 720.000   |
840.000   | na        | na        | na
Fan4A RPM        | 2280.000   | RPM        | ok    | na        | 720.000   |
840.000   | na        | na        | na
Fan4B RPM        | 2160.000   | RPM        | ok    | na        | 720.000   |
840.000   | na        | na        | na
Fan5A RPM        | 2160.000   | RPM        | ok    | na        | 720.000   |
840.000   | na        | na        | na
Fan5B RPM        | 2160.000   | RPM        | ok    | na        | 720.000   |
840.000   | na        | na        | na
...
Eureka! This is exactly what I wanted. Even better, there is a command to get format this information as CSV. I just need to expose this to Home Assistant. There are many avenues that you can take. I could have used a Command Sensor but that would be a lot of duplication and might even strain the IPMI module with so many ad-hoc calls. The tool already collates all the information together, so it would be best to simply take information and go from there. The answer is to use MQTT. Home Assistant has built in support and a discovery protocol for reducing config overhead. All you need to do is publish a JSON payload to a specific topic and it will take care of the rest.
Writing an add-on
I decided to turn this into an add-on because it would be easier to manage and reduce hardcoding many values, which is simplifies maintainability and portability. Following the developer guide to making an add-on wasn’t as straight forward as I was expecting and made many mistakes along the way.
The biggest issue is becoming familiar with the internals. The next issue is debugging, mainly on the MQTT side of things. I found the attributes in the documentation confusing and had to cross-reference with other integrations and trial and error to figure out what attributes can be used for the type of sensors I’m trying to write. At least we had good ol STDOUT to capture outputs for analysis.
The main caveat with Home Assistant’s MQTT discovery is that there’s typically two phases, depending on the type of sensor you’re dealing with. A config phase, and a state phase. The first typically initialising the sensor with meta data such as name and device info etc, while the latter being the value of the sensor itself.
After figuring how to communicate to Home Assistant via MQTT the next step was to write the program. You can view the actual code but the basic logic being:
- Read sensor info from IPMI
- Iterate over each row
- Publish configuration for row
- Read sensor info from IPMI
- Iterate over each row
- Publish sensor value for row
- Pause then jump back to step 4
Using the Home Assistant Base Image provides us with some niceties such as config parsing and communicating with the Supervisor and other services. It also provides the amazing jq tool, which is used to massage data and construct the MQTT payload.
All that’s required to finalise is writing the config.json. The main things I
want to point out is that marking the “startup” as a “services” and require
“mqtt” and to mount the IPMI device (/dev/ipmi0) into the container.
Creating a repository
While I could have this as a local
add-on, this wasn’t
the only add-on that I wrote nor be the last. Instead, I created repo on
GitHub, added a repository.json
file, moved my IPMI add-on as a folder, and then added it the Add-on Store.
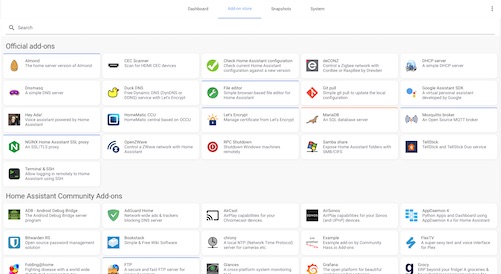
Best thing is it’s easy to share Add-on repositories, so you’re welcome to add mine should you wish. It includes a few other apps which may be useful.